No products
Acoustic vocal booth design for only 800 euros
The quality of a vocal recording is not just about the voice and the talent behind it; it's intrinsically linked to the environment where it's captured. Many artists, podcasters, and voice-over professionals struggle to achieve pristine results in unsuitable spaces. The solution isn't to buy expensive gear, but to invest in the foundation of every good recording: the room itself.
This is where the vocal booth comes in. It's a custom-designed acoustic cabin that can transform any small space into a controlled acoustic environment, perfect for capturing every nuance of your voice. This isn't just a padded room; it's a scientifically engineered system designed to eliminate unwanted resonances and create a clean, professional sound.
Beyond the Microphone: The Truth About Acoustics
There's a common misconception in the audio world that spending thousands of euros on legendary microphones like a Neumann U87 or high-end preamps is the key to professional recordings. The reality is often disappointing. Many professionals with top-tier audio chains still get subpar recordings. The problem isn't their gear; it's the room they're recording in.
The acoustic environment is the first link in the recording chain. Reflections, reverberations, and standing waves within an untreated room color the sound in unpredictable and often undesirable ways, making any effort to achieve clarity and detail futile.
Debunking Common Myths
Over the years, many "miracle" solutions have emerged, promising professional results with minimal effort. It's crucial to be informed to avoid wasting time and money.
-
Portable Acoustic Filters: Accessories like the SE Electronics Reflexion Filter or the Aston Halo can help reduce some direct reflections, but they are insufficient to treat low frequencies and reflections coming from the side walls, ceiling, and floor. They act like a band-aid, not a cure.
-
DIY Solutions: Using egg cartons, pyramid foam panels, or other makeshift solutions doesn't just fail to solve the problem; it can make it worse. These materials tend to absorb mid-high frequencies unevenly, leaving low frequencies to create a muddy, boomy sound. Acoustics is a precise science, not a home experiment.
-
Commercial Panels: Companies like Vicoustic and Gikacoustics produce excellent acoustic panels. However, these standard products are primarily designed for control rooms or larger studios. For a vocal booth, which requires intensive acoustic treatment in a small space, commercial panels are not sufficient to effectively cover the necessary surface area. In these cases, a custom solution is essential.
Vocal Booth vs. Full Room Treatment: The Smart Choice
Treating an entire room to achieve professional vocal recordings can be an expensive and complex endeavor. In addition to the high cost of materials like rock wool and wood, a massive intervention would significantly reduce the usable space. For this reason, a vocal booth is an intelligent and effective solution. It's a custom acoustic cabin, typically at least 4 sqm, that provides a controlled environment for high-quality recordings.
Online forums often spread misinformation, such as the idea that vocal booths produce a "boxy" sound. This is only true when the booth isn't designed and treated professionally. A well-built vocal booth offers impeccable acoustics, eliminating reflections and creating a clean, detailed sound.
Our Vocal Booth Design Service: Step-by-Step
Our service is a meticulous and personalized journey that guides you from the initial analysis to the completion of your acoustic cabin. This isn't a standard solution, but a custom project tailored to your needs and space.
-
Preliminary Analysis: The first step is to evaluate the dimensions and shape of your room. Not all rooms are suitable, and in some cases, if the space is too limited to guarantee a professional result, we may have to decline the project. Your satisfaction and the final quality are our top priority.
-
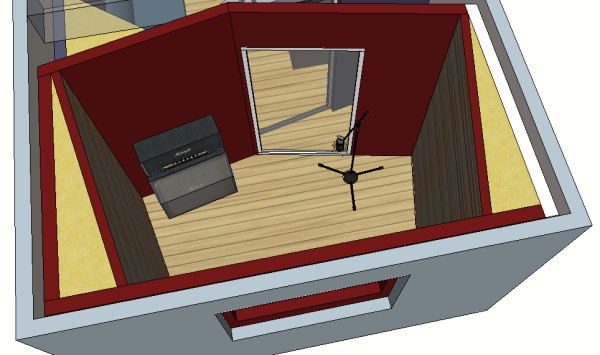
Space Optimization: If your room has problematic geometry, such as a square shape that promotes standing waves, we offer solutions to modify its form. An effective example is using drywall partitions to optimize the space and create an ideal acoustic environment from the start.
-
Professional Support and Guidance: With our design service, you don't just get a plan; you get constant and detailed support. You won't need complex 3D renderings—though we can provide them upon request—because we'll guide you every step of the way. The most crucial part of our service is collaboration: you'll need a skilled carpenter and, in some cases, a drywall installer or handyman, who will work according to our precise instructions to build a perfect acoustic cabin.
Our Philosophy: Character-Rich and Detailed Sound
We don't aim for the "dead" or "boxy" sound that often plagues poorly made vocal booths. Our approach is based on the expertise of world-renowned acoustic engineers who have shaped the sound of countless international hits. We prefer a sound with character and depth, a voice that is both crystal clear and full-bodied.
This philosophy leads us to skillfully balance acoustic absorption and diffusion, creating an environment that not only eliminates flaws but also enhances the unique qualities of the performance.
Your Path to a Perfect Vocal Booth
Designing a professional vocal booth is a meticulous process that begins with a detailed analysis of your space. We follow a scientific, custom-tailored approach for every project:
-
Space Analysis and Modification: We evaluate your room's dimensions and geometry. If necessary, we guide you in modifying the walls with drywall to eliminate unwanted resonances.
-
Acoustic Calculation: We determine the ideal reverb decay time (RT60/RT30) for your booth, ensuring a natural and non-oppressive sound.
-
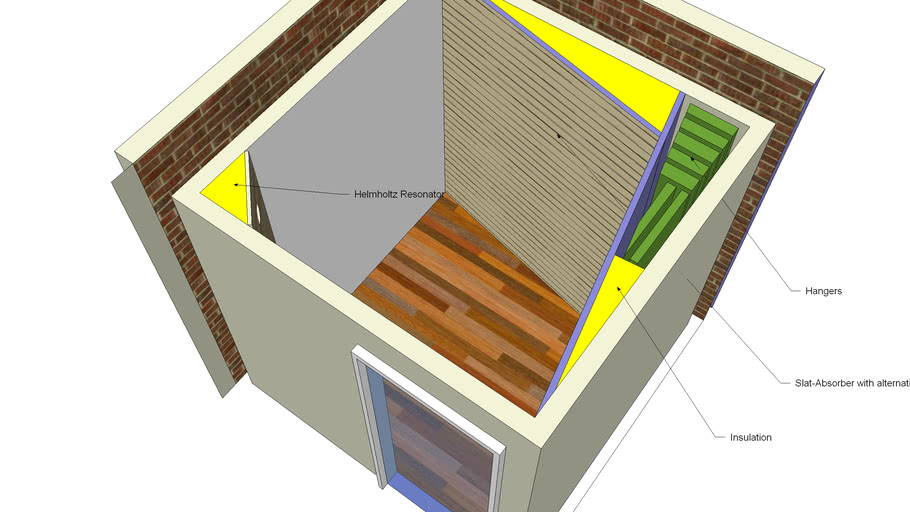
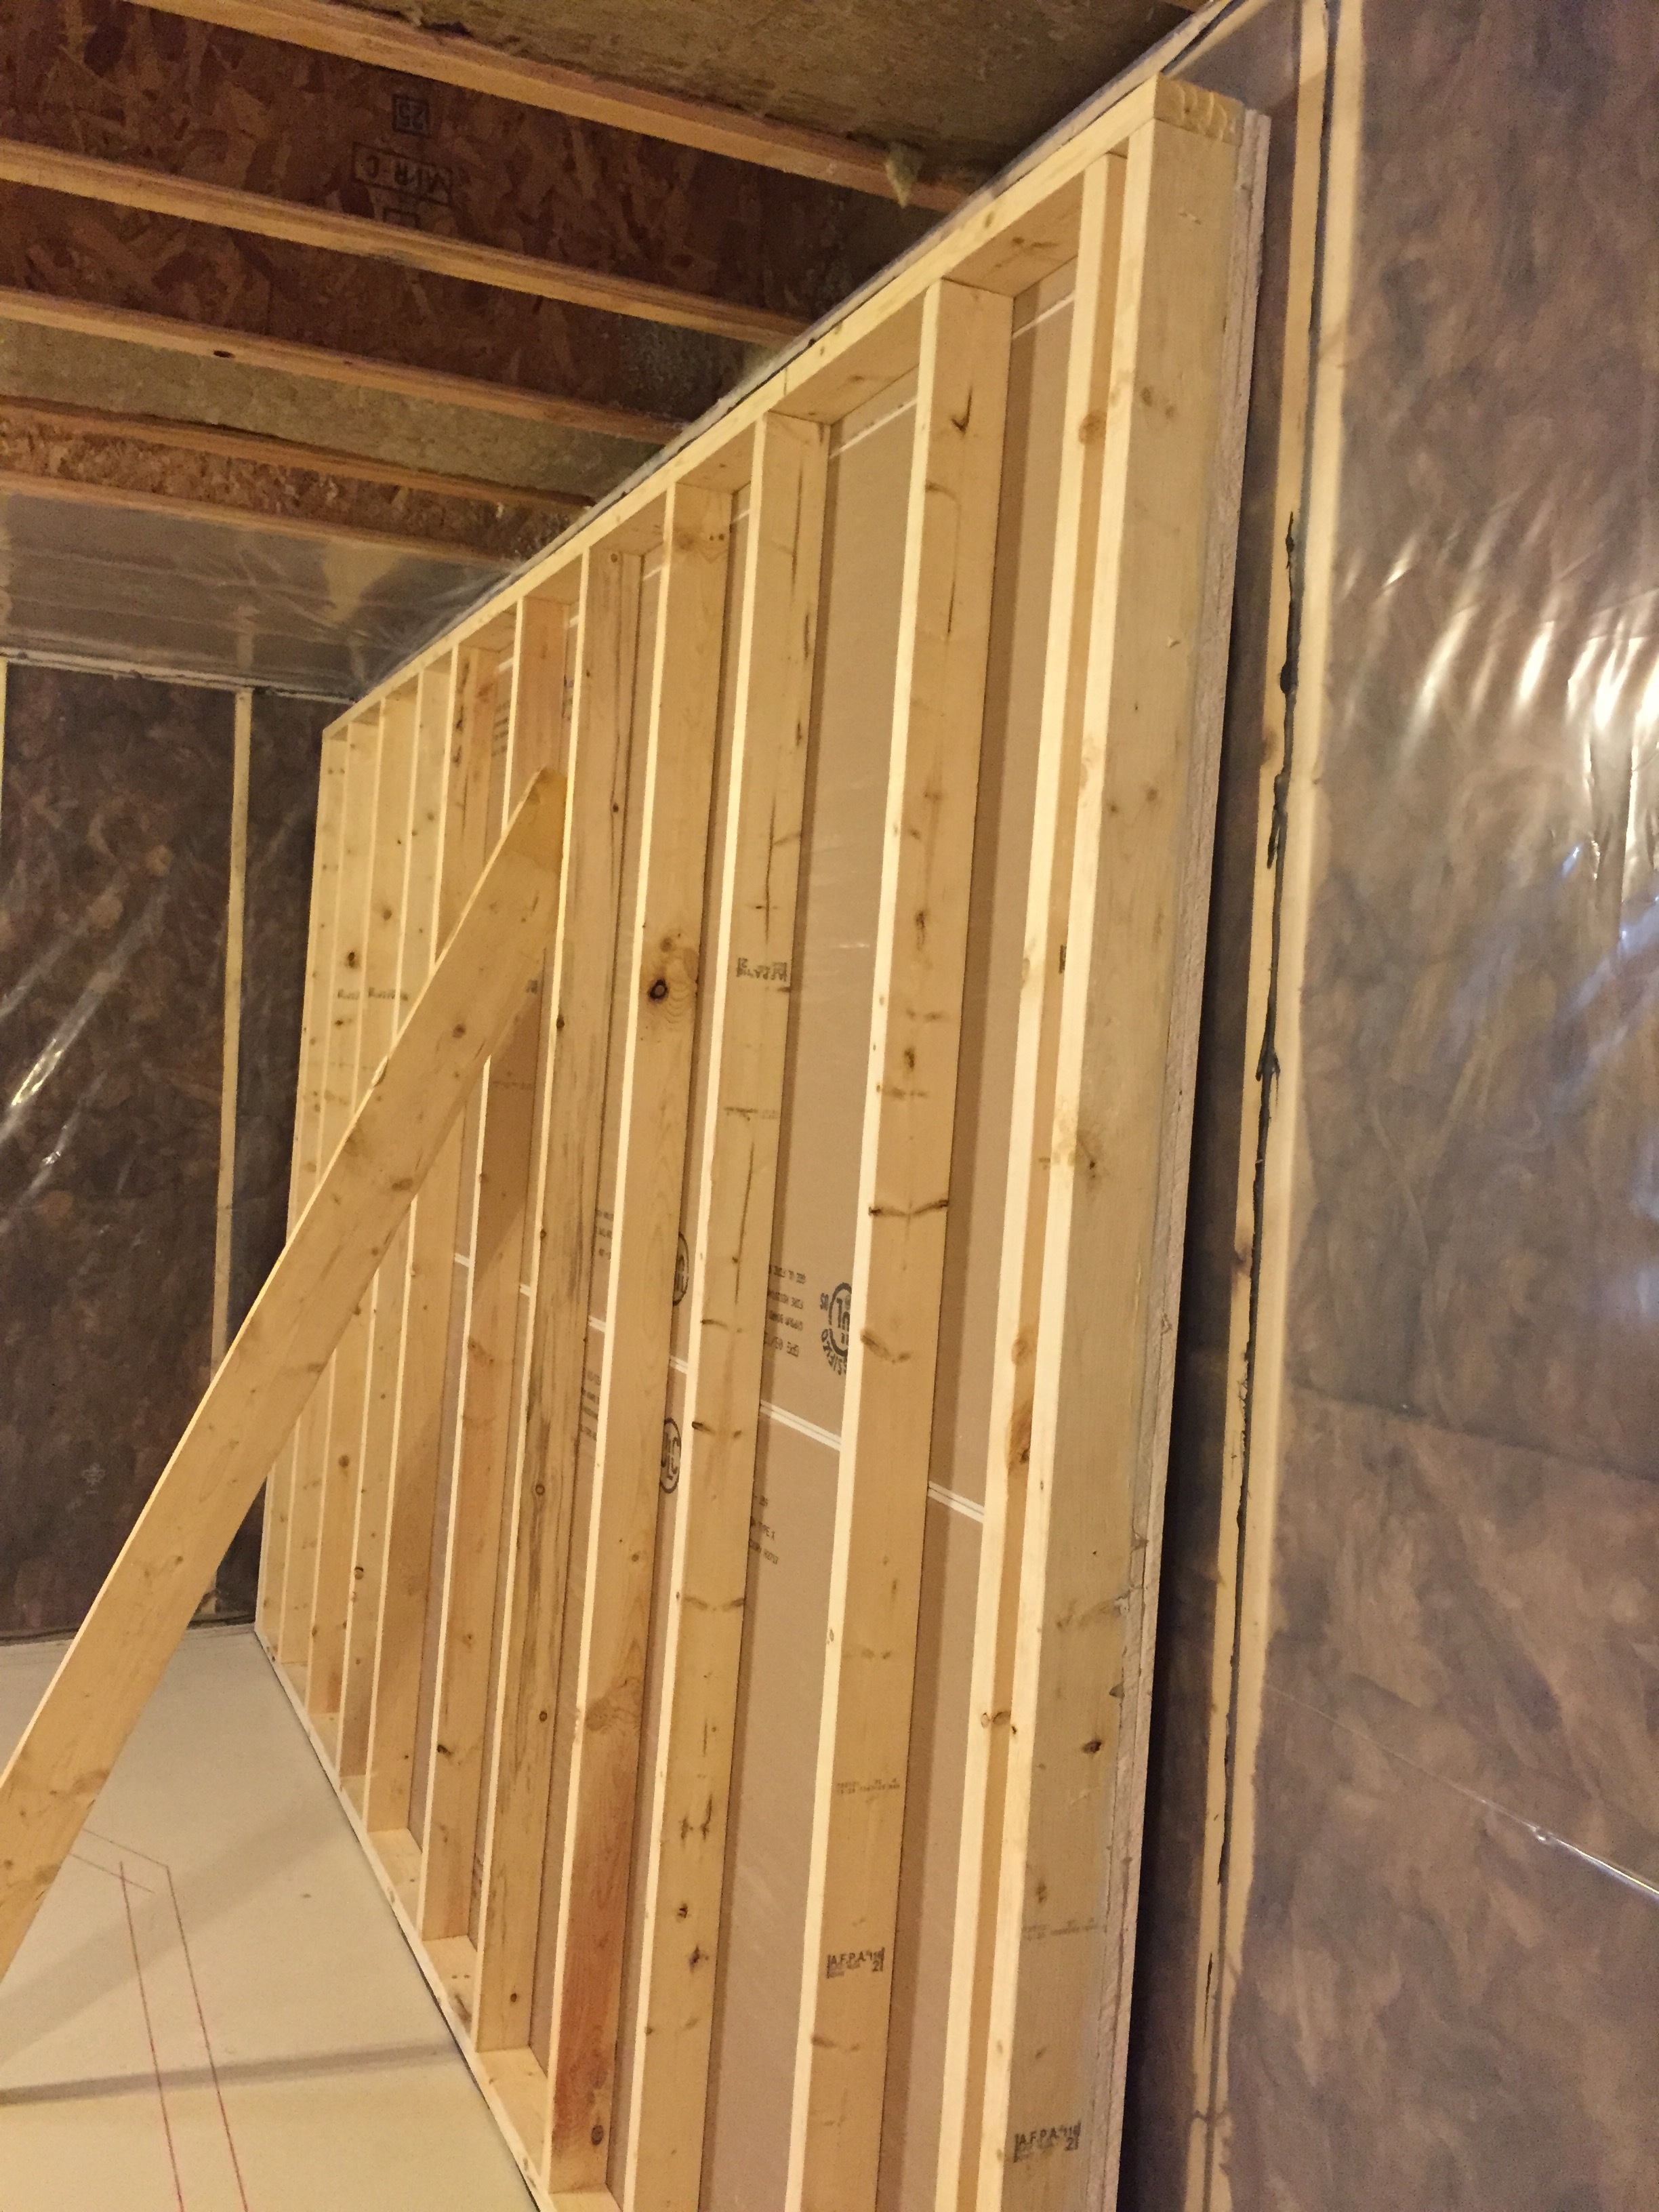
Construction of Sound-Absorbing Walls: We design custom walls using high-quality materials like rock wool, expertly arranged in wooden frames to maximize absorption.
-
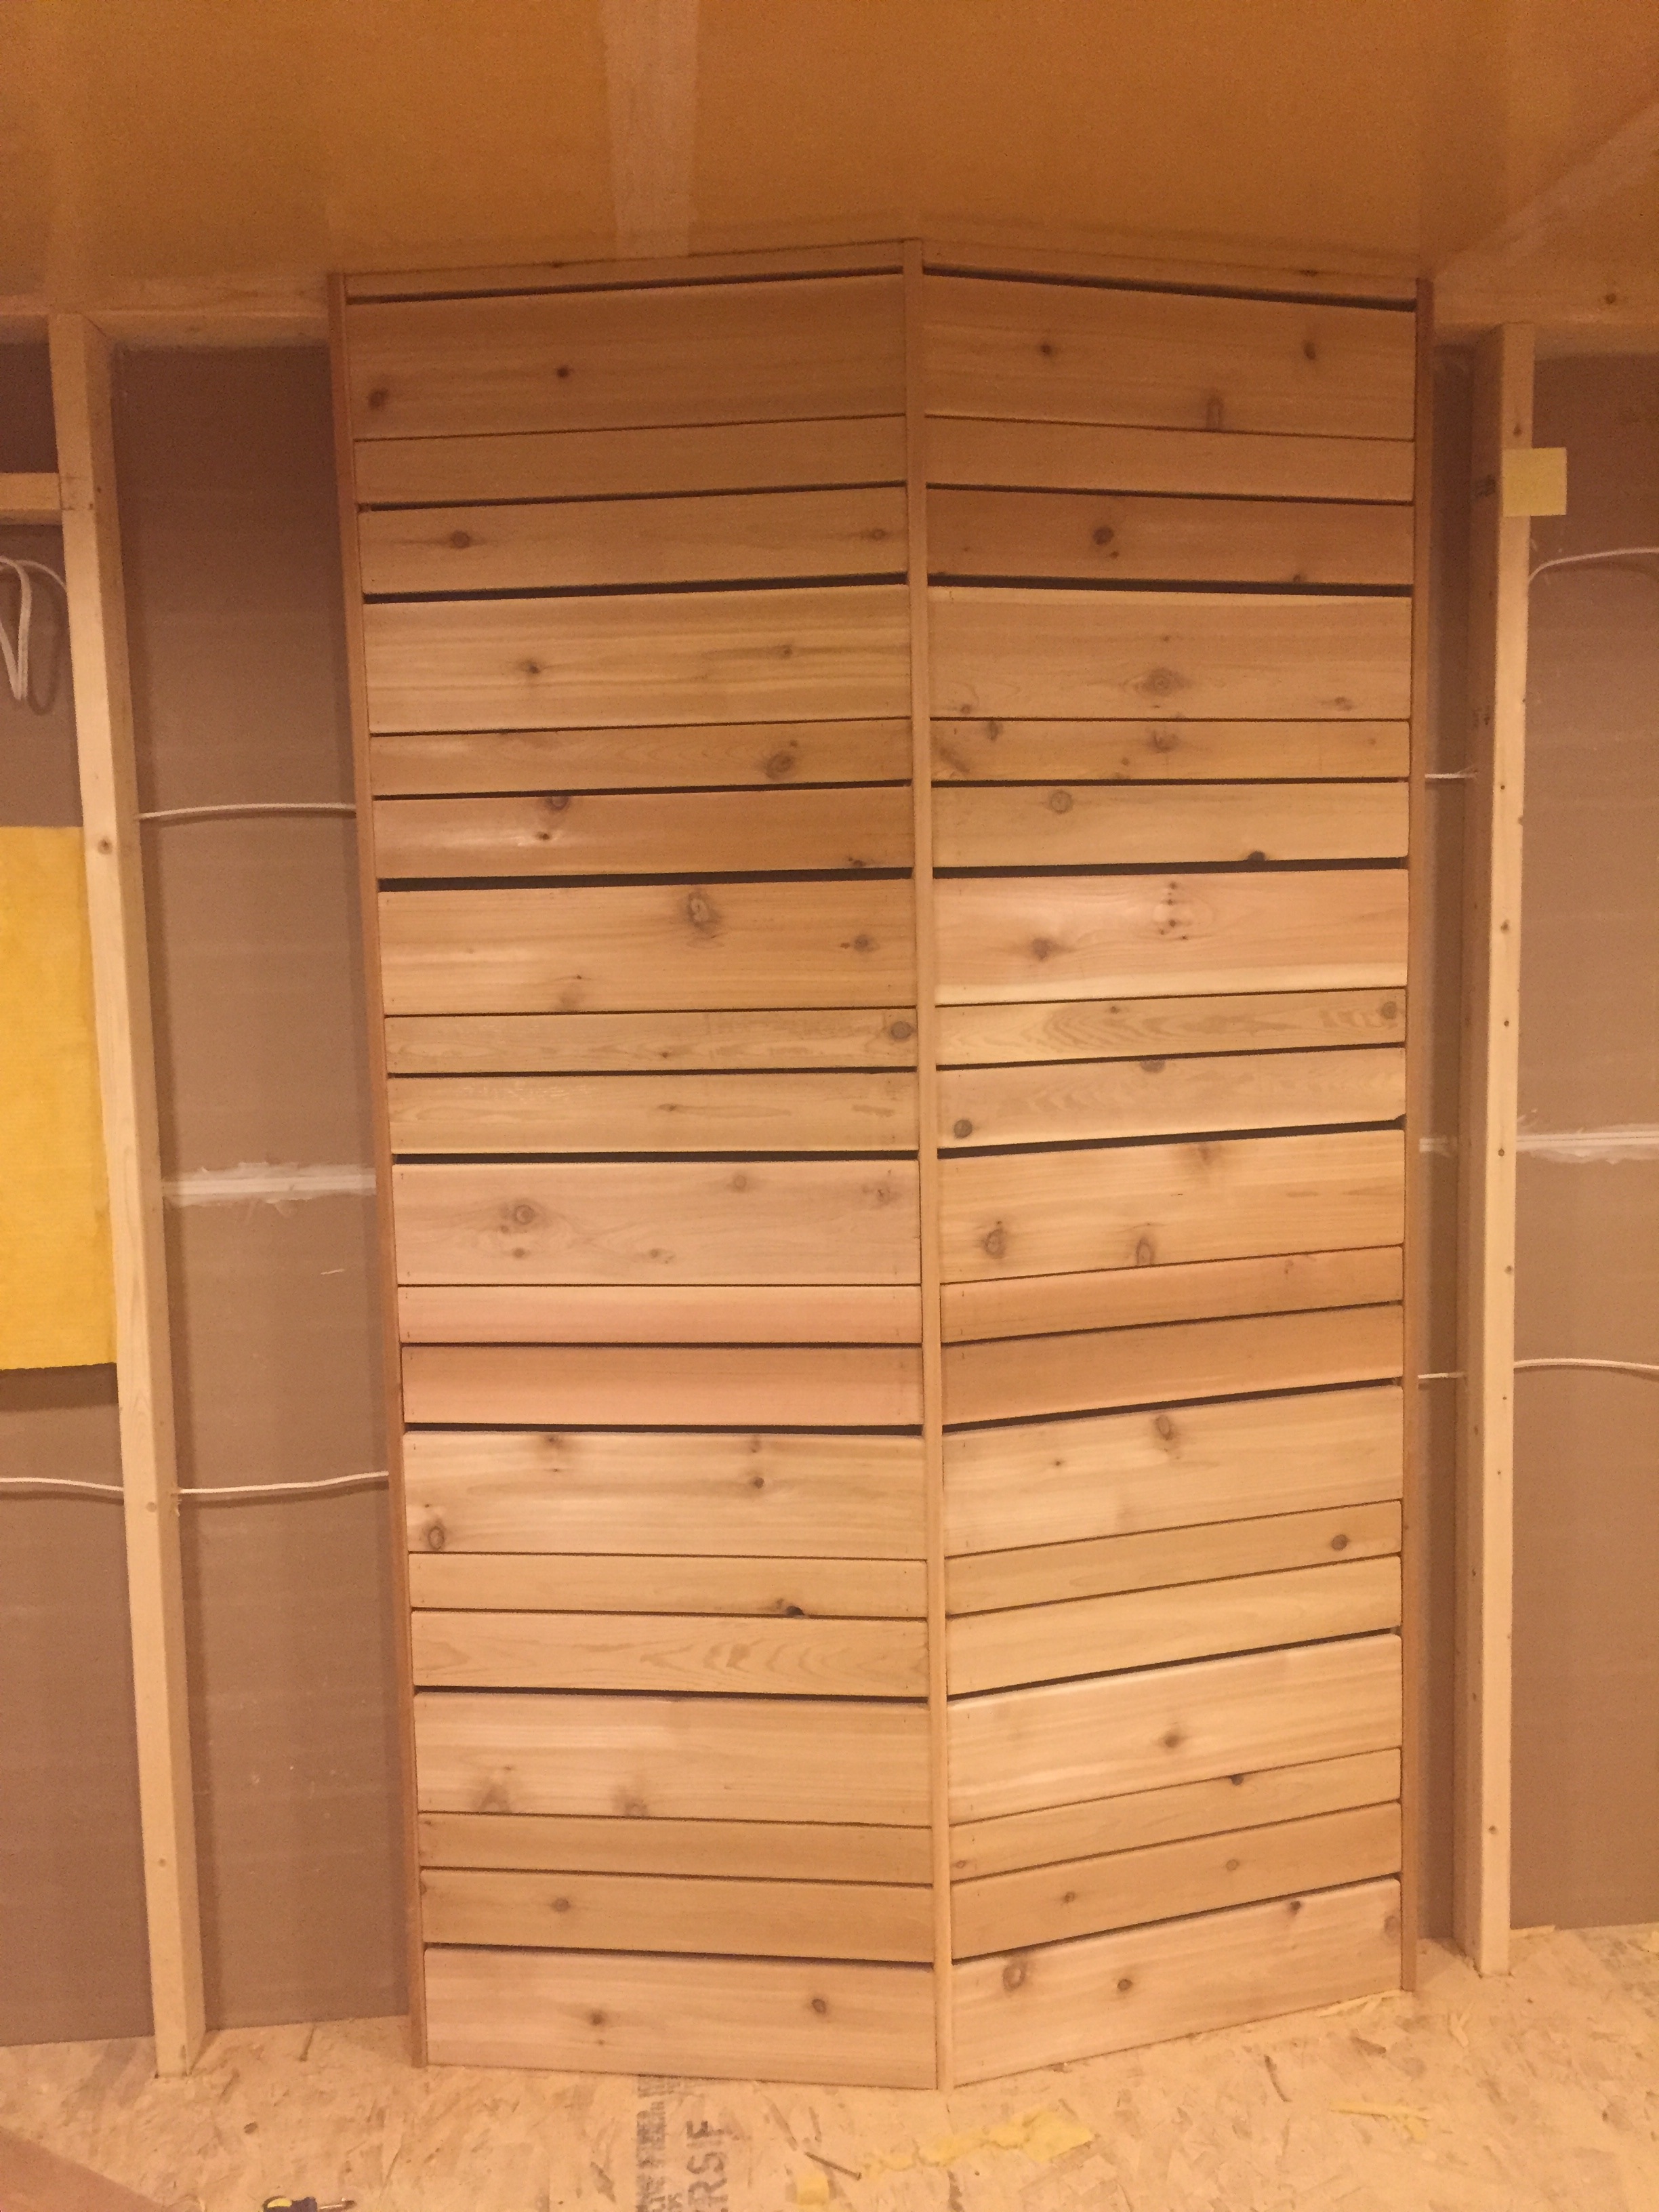
Measurement and Correction: We perform acoustic measurements to identify any frequency deficiencies. We then add Helmholtz resonators with precisely calculated wooden slats to reintroduce any excessively absorbed frequencies, ensuring a balanced frequency response.
-
Final Verification: A final measurement certifies that your vocal booth is perfectly tuned, ready to capture your voice with impeccable quality.
With our design service, you'll have meticulous, step-by-step support. We provide all the necessary instructions for a carpenter or handyman, turning your dream of a professional studio into a reality, without compromise. Your voice deserves the best possible stage—don't settle for less.